Introduction to Wall Decorating
Contents

Importance of Wall Aesthetics
Walls define the character of a room. Improving wall aesthetics enhances the space and showcases your personal taste. A thoughtfully decorated wall can turn an ordinary room into an inviting space.
Overview of Wall Decorating Techniques
From traditional paintings to contemporary digital prints, wall decorating techniques are diverse. Using a combination of textures, colors, and layouts can create a visually appealing environment. Understanding these techniques is essential for designing an engaging and cohesive space.
Selecting the Best Wall for Your Artwork

Assessing Wall Space and Lighting
Choosing the right wall for your art starts with evaluating space and light. A large wall is ideal for bigger pieces, while a smaller wall suits a more compact arrangement. Consider the natural light in the area; art looks best under soft, indirect sunlight that enhances colors without causing glare or fading.
Considering Wall Color and Texture
- Wall color influences the atmosphere. Neutral shades can highlight your art, while vibrant colors can either enhance or overshadow the artwork based on their strength.
- Texture provides dimension. A smooth wall offers a classic look that emphasizes the art, whereas a textured wall can create an interesting background, contributing to the piece’s overall story.
Advantages of Wall Art

Enhancing Room Ambiance
Wall art serves as more than just decoration; it can transform a room’s atmosphere. The right piece can change the entire feel of a space, adding energy or creating calm. For example, a soft landscape can bring tranquility to a busy office, while vibrant abstract art can energize a quiet study room.
Personalizing Your Space
- Showcasing your personality: The wall art you choose reflects your tastes and character. It allows you to display your unique style and share your story visually.
- Building connections: Art can trigger memories and emotions, making your space a true representation of your experiences. Each piece can spark conversations, sharing aspects of your life with guests.
Tools and Materials Needed for Wall Decorating

Overview of Common Tools
Key tools for wall decorating include a level, measuring tape, and various hangers and hooks suited to the wall type and artwork weight. A stud finder is crucial for identifying secure anchoring points, ensuring heavier pieces are safely mounted.
Selecting Quality Materials for Durability and Aesthetic Appeal
- Durability: Choose high-quality frames and mounting materials that ensure longevity and protect against humidity and UV light.
- Aesthetic Appeal: Select materials that match both the artwork and the room’s decor. The right frame can enhance the piece, while the wrong one can diminish its impact.
Planning Your Wall Layout

Importance of a Layout Plan
Creating a layout plan is crucial for a well-organized wall display. It ensures each piece of art is placed to enhance its visual appeal, balancing the room’s look with your personal style. A well-thought-out arrangement can turn individual pieces into a unified collection.
Tips for Visualizing and Planning
- Sketch it out: Start with a rough sketch or use digital tools to plan the placement before drilling any holes. This can save time and prevent unnecessary wall damage.
- Consider proportions: Focus on the scale and spacing between artworks. Proper proportions maintain visual balance, ensuring no single piece dominates the others.
- Flexibility: Choose adjustable hanging systems for easy repositioning. This flexibility is useful as your collection grows and changes over time.
Creative Ways to Arrange Pictures for an Impressive Wall Display
Creating a Harmonious Grid of Picture Frames
Think of your wall as a blank canvas where a grid of picture frames can display your memories and art. Choose frames that match in size and style to create a uniform look. Measure your wall space carefully and plan the grid’s dimensions to ensure it fits perfectly.
Step-by-Step Guide to a Perfect Grid
- Measure Your Space: Measure your wall and decide on the spacing between frames, typically 2-3 inches, to ensure a cohesive look.
- Mark Your Wall: Use painter’s tape to create a temporary outline of your grid, serving as a visual guide for accurate placement.
- Hang with Precision: Use a level to ensure each frame is perfectly aligned. Start at the center of your grid and work outward, maintaining balance.
Whether you choose a symmetrical or asymmetrical grid, let the room’s character guide your decision. Larger walls may require bigger frames or more rows, while smaller spaces benefit from a more selective arrangement.

Curating a Dynamic Gallery Wall with Varied Frame Sizes
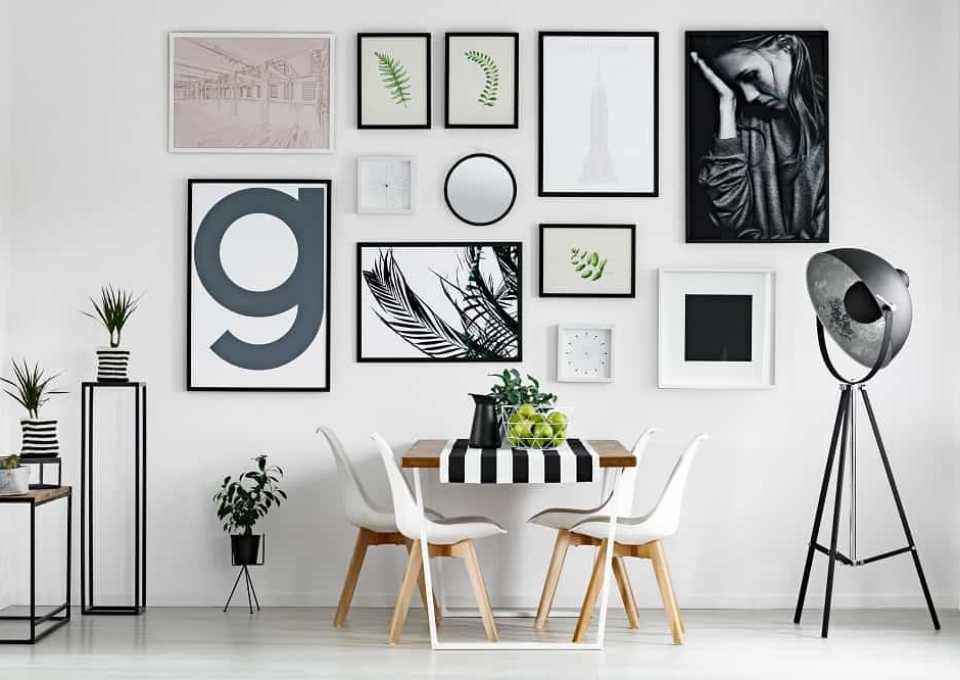
Think of a gallery wall as a visual ensemble, where each frame size contributes its unique element. Begin with a mix of frames that vary in size, depth, and style. This diversity ensures an engaging display without any single piece overshadowing the others. Combine large, striking pieces with smaller ones to create depth and interest.
Anchor your layout with larger frames, positioning smaller ones around them. This approach maintains balance and encourages creativity. For a cohesive look, stick to a consistent color palette or theme. This unifies your diverse collection into a harmonious display.
Space frames thoughtfully to allow your wall to breathe. Place heavier pieces at the lower or central parts of your wall, while lighter ones can be positioned higher or spread out. Before finalizing, lay your frames on the floor to perfect the spacing and arrangement.

Effortless Elegance with Command Strips
Transform your walls into a gallery of memories with the simplicity of Command Strips. These adhesive tools offer a straightforward and reliable hanging solution. Say goodbye to nails and drills, and embrace a versatile and stylish approach.
- Select the Right Strip Choose a strip that matches your frame’s weight for a secure hold.
- Surface Prep Clean the surface with rubbing alcohol to ensure a strong bond.
- Press Firmly Apply pressure to the strip for 30 seconds to secure it.
- Patience Pays Allow the adhesive an hour to set properly.
Follow the weight guidelines to protect your walls and cherished items. When you want to change your decor, the strips remove cleanly without leaving residue or damage. With Command Strips, your decor is effortlessly elevated.

Incorporating Floating Shelves for Picture Frames
Transform your walls into a display of memories with floating shelves. These sleek ledges provide a platform for your picture frames, allowing each photograph to stand out. The key is their simplicity—a smooth extension from wall to shelf, without visible brackets.
Choosing the right shelf is crucial. Size and strength are important; they must support your frames securely. Consider varying lengths across your wall to accommodate both small and large frames.
Arranging your frames is like creating a visual composition. A balanced mix of portrait and landscape, large and small, creates an appealing rhythm. Layer smaller frames in front of larger ones to add depth. Include some decorative elements to enhance the display.
However, moderation is important. Give each frame space to be appreciated. A cluttered shelf can be overwhelming, so select your pieces thoughtfully.
With these shelves, your pictures will stand out. They will turn a plain wall into a gallery, a space where memories are showcased.

Infusing Character with Mixed Media Art
Imagine a wall that tells your story, where each piece represents a chapter of your life. Mixed media art combines the nostalgia of photographs with the boldness of paintings, the precision of prints, and various artistic elements. This unique blend adds life to your space, creating a narrative that standard decor can’t match.
When curating your collection, experiment with colors and textures. A sepia-toned photo can contrast beautifully with a vibrant abstract painting, creating a visual story of past and present. Add a tactile dimension with unexpected items or fabrics, ensuring each element is both harmonious and distinct.
Balancing your pieces is crucial. Give each item its own space while maintaining a cohesive arrangement. Your wall is not just a space—it’s a reflection of your journey.

Here are some tips to guide your creative process:
- Contrast and Complement Pair old with new, soft with bold, for a dynamic yet cohesive look.
- Space and Symmetry Give each piece room to breathe while maintaining visual balance.
- Texture and Tactility Mix materials that invite touch and add depth to your display.
Mastering Symmetry with Identical Frames
Imagine a wall that radiates harmony and curated elegance. Symmetry is your key to transforming ordinary spaces into captivating displays. Start by choosing identical frames—matching in shape, style, and design. These uniform frames create a balanced and cohesive look.
Begin with a central frame at eye level, serving as the focal point. Arrange the other frames equidistantly, mirroring each other to maintain balance. This precise alignment creates a visually pleasing and orderly appearance.
Symmetry extends to the art within the frames. Choose pieces that share similar themes or colors to maintain consistency. Consistency is crucial:
- Identical Mats: Use uniform mats to enhance cohesion.
- Even Spacing: Measure carefully to ensure equal distances between frames.

Mastering the Art of Picture Placement with Templates
Imagine a wall where each frame is perfectly aligned and spaced. This precision is achieved using templates. Trace your frames onto paper, marking where to place the hardware. This plan allows you to arrange the frames on the floor before committing to the wall.
Templates can be customized to fit your needs. For larger pieces, combine papers to scale; for unique shapes, cut and tape as necessary. Consistency is key—aim for 2-3 inches of space between frames for a cohesive look.
With templates, you can confidently use your hammer or adhesive strips. The result? A well-organized wall that reflects your attention to detail.

Incorporating Mirrors and Other Decorative Elements
Imagine a wall that not only displays photographs but also enhances your space with its reflection. Mirrors placed among picture frames can transform a room, adding depth and improving light distribution. When selecting mirrors, consider size and style—choose designs that complement your decor for a cohesive look.
Place mirrors strategically to create a visual narrative. A large mirror can serve as the focal point, with photos arranged around it. Alternatively, a collection of smaller mirrors interspersed with frames can bring a gallery wall to life. Balance is essential—ensure each piece has enough space.
Add shelves or artwork to give your wall more dimension. This layered approach reflects your taste and draws attention. Aim for unity—select elements that match in color, texture, or theme for a seamless visual experience.

- Size Matters: Choose larger mirrors to make a statement or smaller ones to complement.
- Style Harmony: Pick frames that match your decor, whether it’s modern or rustic.
- Strategic Placement: Use mirrors to balance light and add depth, positioning them for maximum effect.
Hanging Frames in a Staircase Display
Transform your staircase into a striking gallery with well-chosen picture frames. Start by measuring the wall space along the staircase. Use a light pencil mark or painter’s tape to outline where each frame will go, ensuring they align with the staircase’s incline.
Focus on balance and symmetry. Even spacing is crucial, mirroring the staircase’s slope. Choose frames of different sizes for variety, but keep a consistent color scheme or design theme. Place the central frame at mid-ascent to serve as the focal point.
Expand from this central frame with precision, keeping uniform gaps between frames. This approach not only decorates the space but also creates a cohesive visual story.
In Closing
In conclusion, arranging pictures on your walls is more than just decoration; it’s a way to enhance your living space and reflect your personal journey. By selecting the right walls, considering light and color, and using various hanging techniques, you can create a visually appealing display that personalizes your space. Whether you choose a symmetrical grid, a dynamic gallery wall, or mixed media, the key is thoughtful placement and balance of elements. Use these strategies to elevate your decor and turn your walls into a testament to your unique aesthetic and life’s stories.

